

HOW TO: install a Roaring Toyz lowering kit
Hey all - just wanted to share my experience installing a Roaring Toyz lowering kit on my wife's 300. The job was simpler than I anticipated, and will be easily reversible when she is confident in her ability to hop off the seat at stoplights.
I want to start this thread with a request - Let's keep this thread about 'how' to lower a bike not 'why'. I am not posting this to discuss the pros and cons of lowering a bike. I understand it changes the suspension and steering dynamics, and there are plenty of other threads discussing that. Let's use this as a walk-thru for those who are determined to lower their bike and are considering doing it themselves. Thanks!")
Let's get started!
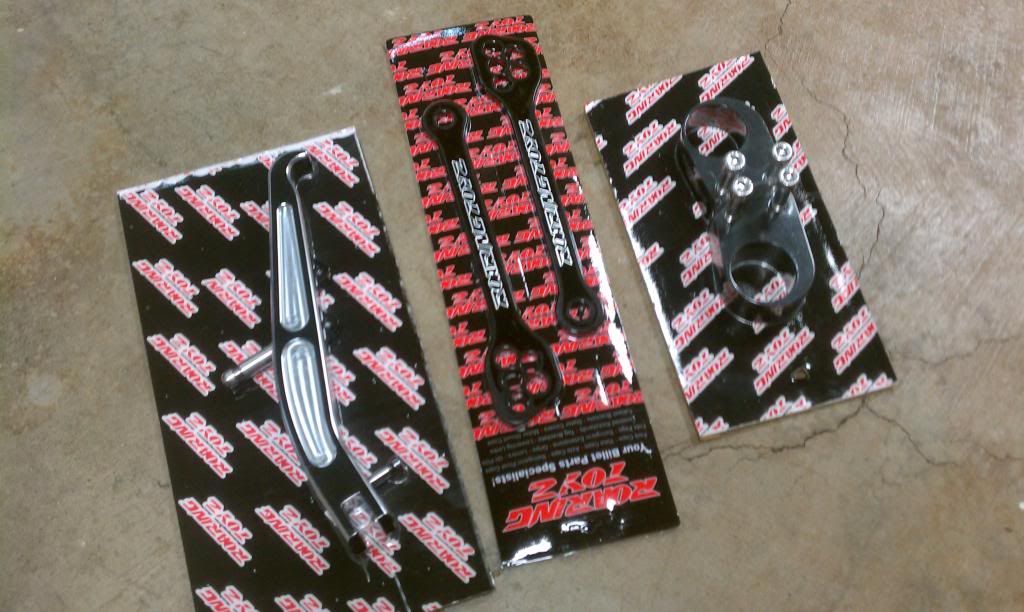
The kit itself is simple: blocks to raise the bars in front to allow the forks to rise up further through the top triple clamp, longer 'dogbone' links for the rear to raise the swingarm in relation to the rear shock, and a shorter kickstand. Some may choose to shorten (section and reweld) the stock kickstand, or just use the stock one as is. I didn't like how upright the bike was with the stocker after lowering, and still wanted the ability to raise the bike back up at a later date so I didn't want to cut the stock one up.
![Image]()
The trick to this project is supporting the bike. Stands don't work, as the bike has to be supported by the frame, not the suspension. I used my engine hoist (cherry picker) and straps which allowed my to adjust the bike height while working. I know there are other ways out there to support the bike using floor jacks and wood blocks, and I'm sure someone out there has done it with the side stand, some dental floss, and a dozen phone books.
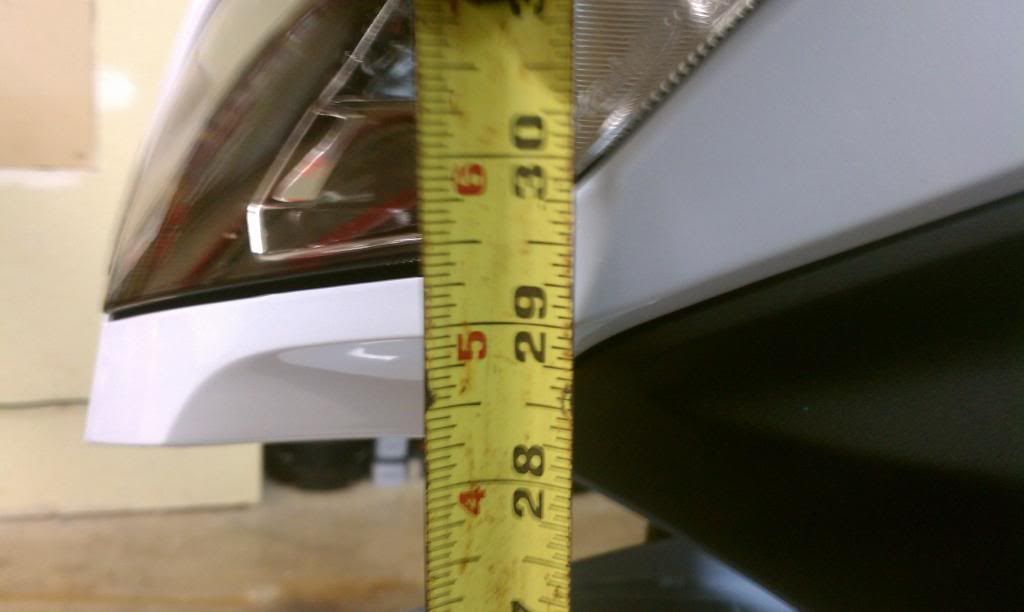
I started by taking some baseline measurements of the bike's ride height. It doesn't matter so much where you measure from, as long as you are going to be able to repeat that measurement. I was going for lowering the bike 1". For the front I chose the edge of the bodyline near the headlight...
![Image]()
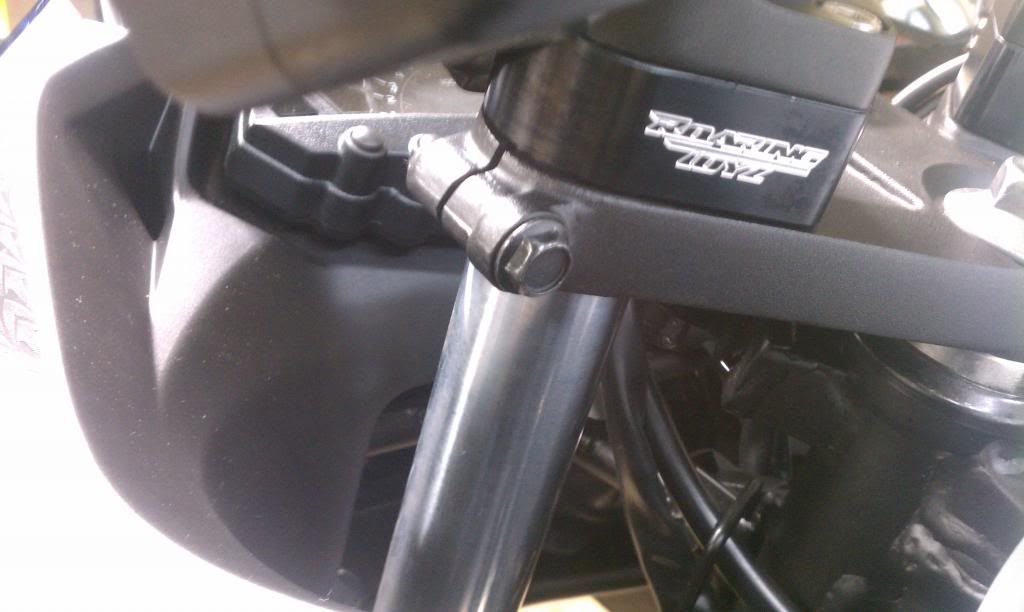
I removed the 4 bolts (6mm hex) holding the bars to the triple. The controls can be left on the bars, I just wrapped them in some towels so they didn't scuff the fairings.
![Image]()
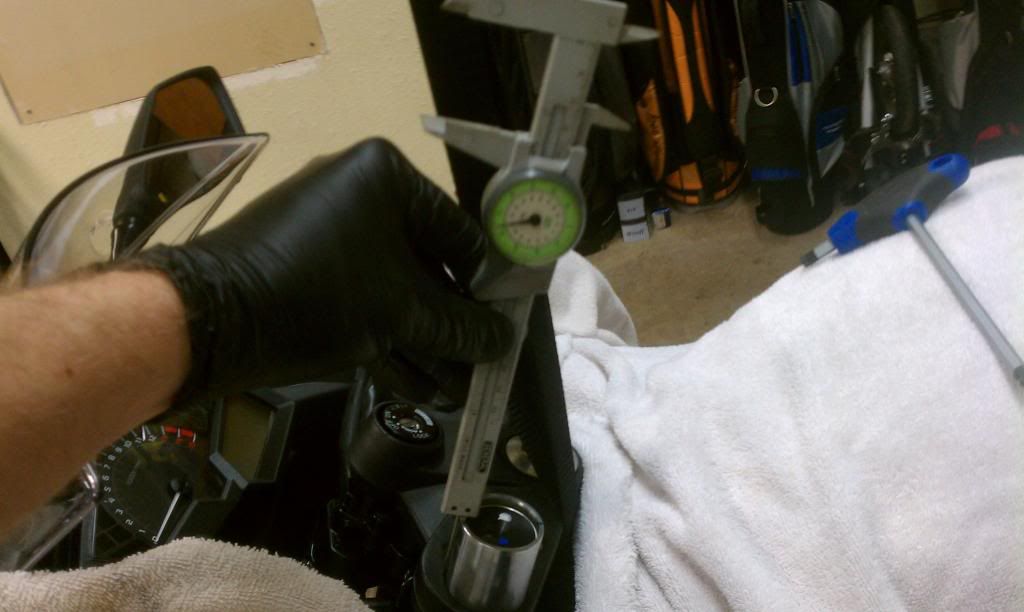
Next I measured how far the factory had the forks out the top of the triple. 0.42" on the left and 0.41" on the right for those interested.
![Image]()
I loosened the lower triple clamps (8mm hex) on the forks with the bike still on the ground. It was easier to do because I could still turn the forks side to side to get at them. Access was best from the top.
![Image]()
![Image]()
It was finally time to support the bike. I used some straps that came with a tie down set and looped around the steering head.
![Image]()
With the bike's weight supported now by the hoist I loosened the top triple clamps (12mm capscrew). The next part would have been easier with another set of hands, but with some patience I lowered the hoist and worked the forks up through the triple until I had 1.42" showing.
![Image]()
The blocks in the kit slip over the exposed forks and the supplied (longer) bolts go in. The factory plastic bolt caps snap into the new bolts, for anyone who was concerned.
![Image]()
I reassembled everything in reverse order and the front was done in under an hour, much quicker and easier than I anticipated.
Time for the rear.
I supported the rear of the bike strapping to the pillion peg brackets, being cautions near the rear master cylinder. The dogbone links are easy enough to get at, and are attached by two 19mm bolts with locking nuts. As I got further into the rear I took less and less pictures - the factory coated the outside of these bolts with some fantastic white grease that I was getting everywhere and made using the phone/camera difficult. I would have understood having grease where the bolts contacted the links, but it was ONLY ON THE HEAD OF THE BOLTS WHERE THE SOCKET GOES ON. Head of bolt=greasy. Shank of bolt=dry.
![Image]()
![Image]()
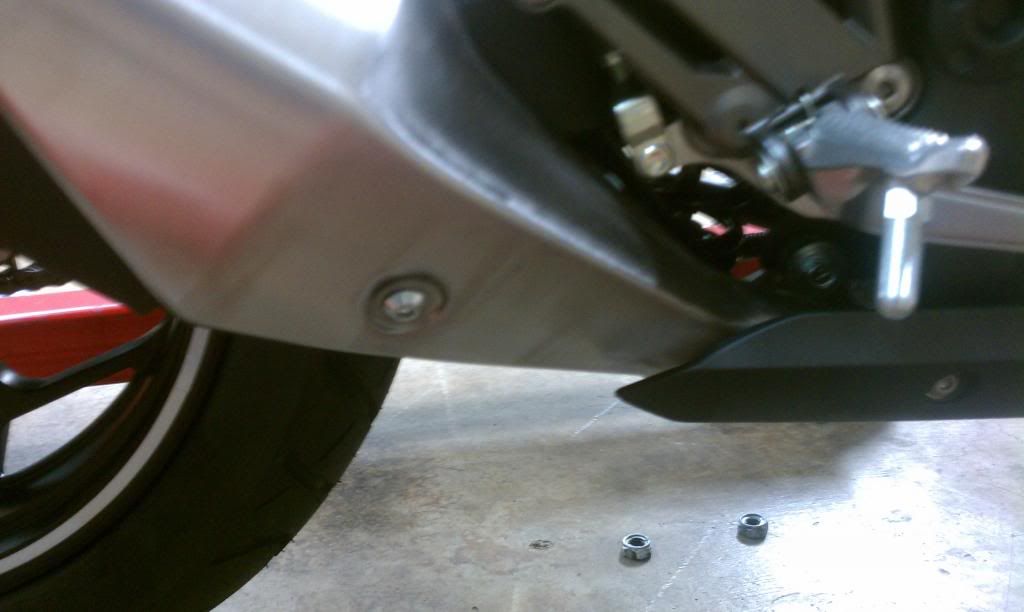
I had to remove the exhaust heatshield to get the 19mm bolts out. There was a band clamp at the bottom of the shield around the pipe that I loosened and slid down the pipe to get it out of the way and a 5mm hex bolt visible from the outside. There is also a tab at the top of the shield that attached to the silencer, I had to slide the shield forward to free it from the bike.
![Image]()
![Image]()
With the heat shield out of the way and the nuts off of the 19mm bolts I raised the hoist until there was no pressure on the suspension and the bolts slid right out. The new links go in with the single hole on top, and your choice of holes on the bottom. The shortest choice out of the 5 (top left hole in the pic below) is the same as the stock link. I chose the nearest one to stock, which lowered the bike 1" +/- 1/8" according to my tape measure. I have seen other internet posts about the top center hole being the one for 1". Update - I switched to the top center hole which is correct for the 1" drop, bike sits level this way. Pictures will still show the wrong hole being used. - This is my only disappointment with the Roaring Toyz products so far - $200 worth of beautiful billet aluminum parts but not a single scrap of paper with any instructions, descriptions, or warnings. Nothing. A note about which hole drops the bike how far would have been helpful.
![Image]()
So with the lowering links bolted in place and the heat shield back on I set the bike down on the ground and checked out the kickstand situation. With the bike now 1" lower than stock the factory kickstand worked, but the bike was too upright for my comfort. Replacing it was simple.
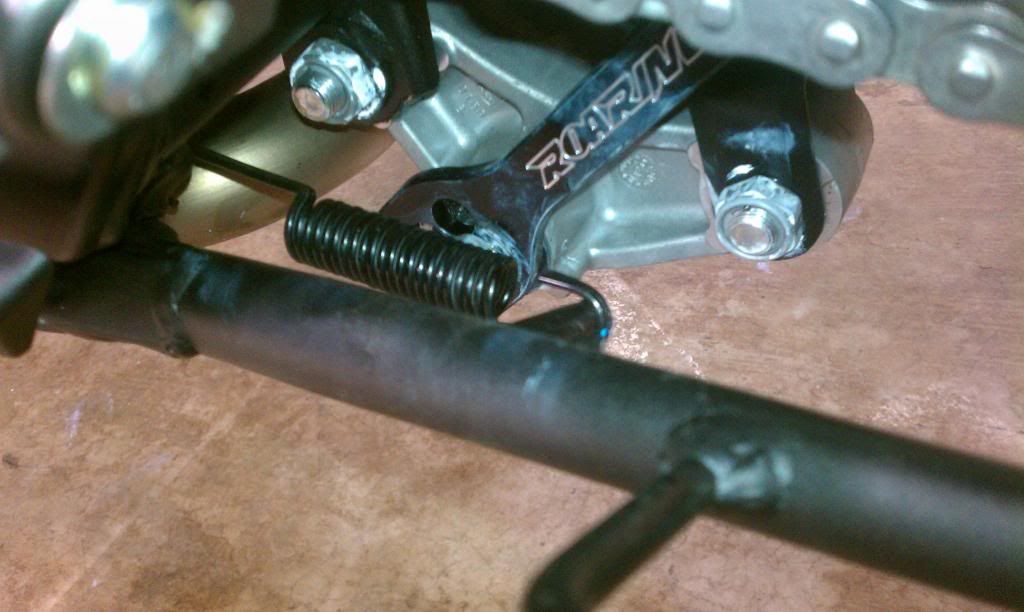
With the kickstand up (bike on stands) I removed the springs from the kickstand.
![Image]()
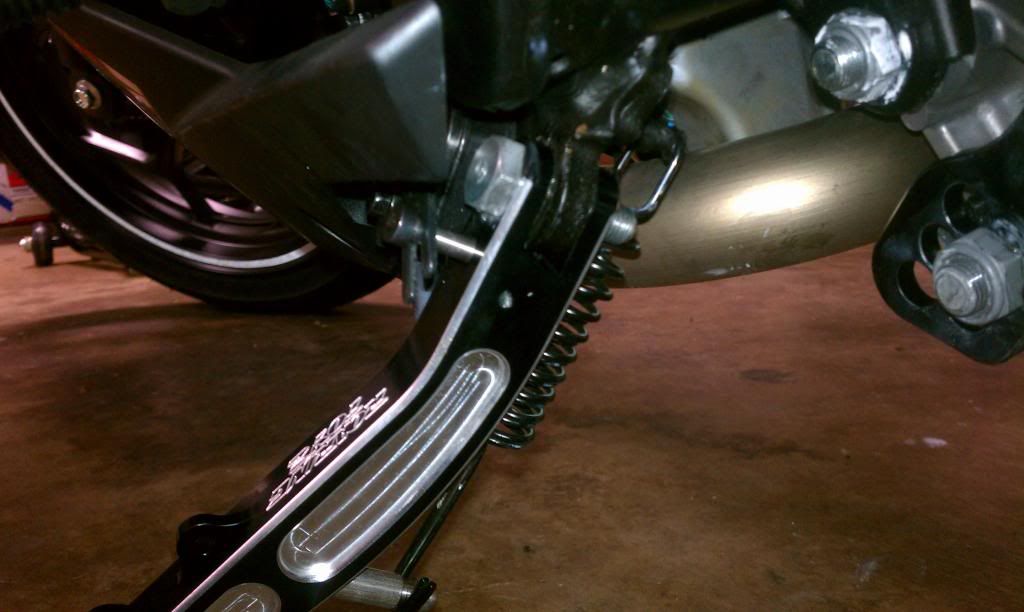
I then removed the 5mm hex bolt attaching the lower fairing to give myself some room to work. I did not need to remove the entire fairing, I just needed to be able to pry it down a little bit. With the fairing loose, I removed the screw holding the actuator for the kickstand kill switch. Be careful, there is a lock washer and a nylon washer behind the screw. The kickstand itself is held with a 17mm bolt and nut. The new kickstand uses the same bolt, but in a different way. The factory stand has the bolt on the inside and the nut on the outside of the stand. The new one has the bolt on the outside and the inside of the stand is threaded itself (no nut needed). With the new stand on I put the kill switch actuator back on - being careful to align the index ( 2 flat sides) on the switch with the actuator. I reattached the springs and DONE!
![Image]()
![Image]()
All together I did this project in under 2 hours by myself and taking time for pictures and wiping white grease off of everything I touched.
update - took it for a short test ride - I didn't notice any adverse affects in handling or steering. The only difference is that the riding position is very upright now with the bars higher and closer.
Hey all - just wanted to share my experience installing a Roaring Toyz lowering kit on my wife's 300. The job was simpler than I anticipated, and will be easily reversible when she is confident in her ability to hop off the seat at stoplights.
I want to start this thread with a request - Let's keep this thread about 'how' to lower a bike not 'why'. I am not posting this to discuss the pros and cons of lowering a bike. I understand it changes the suspension and steering dynamics, and there are plenty of other threads discussing that. Let's use this as a walk-thru for those who are determined to lower their bike and are considering doing it themselves. Thanks!
Let's get started!
The kit itself is simple: blocks to raise the bars in front to allow the forks to rise up further through the top triple clamp, longer 'dogbone' links for the rear to raise the swingarm in relation to the rear shock, and a shorter kickstand. Some may choose to shorten (section and reweld) the stock kickstand, or just use the stock one as is. I didn't like how upright the bike was with the stocker after lowering, and still wanted the ability to raise the bike back up at a later date so I didn't want to cut the stock one up.
The trick to this project is supporting the bike. Stands don't work, as the bike has to be supported by the frame, not the suspension. I used my engine hoist (cherry picker) and straps which allowed my to adjust the bike height while working. I know there are other ways out there to support the bike using floor jacks and wood blocks, and I'm sure someone out there has done it with the side stand, some dental floss, and a dozen phone books.
I started by taking some baseline measurements of the bike's ride height. It doesn't matter so much where you measure from, as long as you are going to be able to repeat that measurement. I was going for lowering the bike 1". For the front I chose the edge of the bodyline near the headlight...
I removed the 4 bolts (6mm hex) holding the bars to the triple. The controls can be left on the bars, I just wrapped them in some towels so they didn't scuff the fairings.
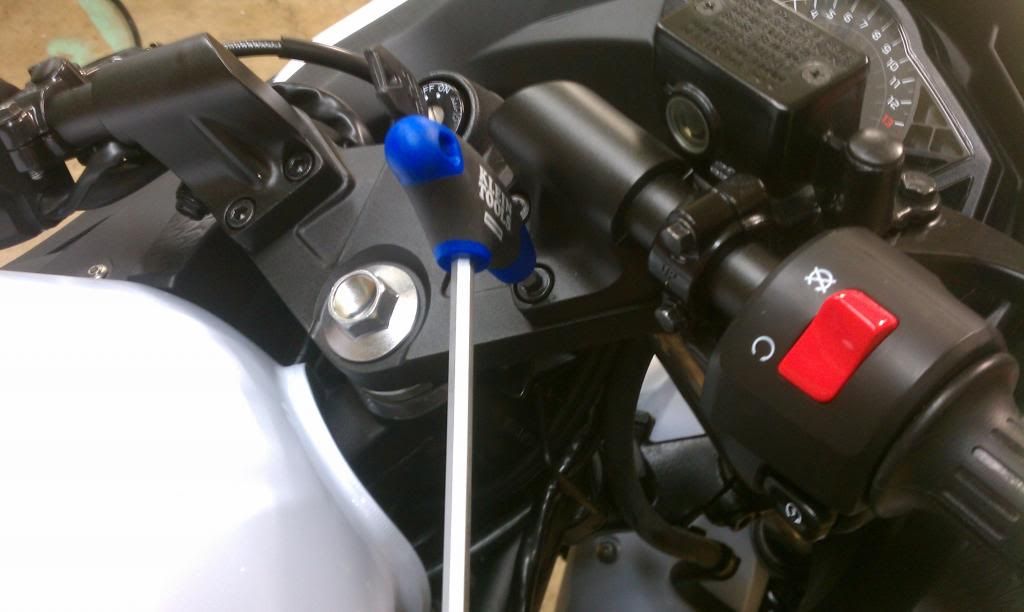
Next I measured how far the factory had the forks out the top of the triple. 0.42" on the left and 0.41" on the right for those interested.

I loosened the lower triple clamps (8mm hex) on the forks with the bike still on the ground. It was easier to do because I could still turn the forks side to side to get at them. Access was best from the top.


It was finally time to support the bike. I used some straps that came with a tie down set and looped around the steering head.

With the bike's weight supported now by the hoist I loosened the top triple clamps (12mm capscrew). The next part would have been easier with another set of hands, but with some patience I lowered the hoist and worked the forks up through the triple until I had 1.42" showing.
The blocks in the kit slip over the exposed forks and the supplied (longer) bolts go in. The factory plastic bolt caps snap into the new bolts, for anyone who was concerned.
I reassembled everything in reverse order and the front was done in under an hour, much quicker and easier than I anticipated.
Time for the rear.
I supported the rear of the bike strapping to the pillion peg brackets, being cautions near the rear master cylinder. The dogbone links are easy enough to get at, and are attached by two 19mm bolts with locking nuts. As I got further into the rear I took less and less pictures - the factory coated the outside of these bolts with some fantastic white grease that I was getting everywhere and made using the phone/camera difficult.
I would have understood having grease where the bolts contacted the links, but it was ONLY ON THE HEAD OF THE BOLTS WHERE THE SOCKET GOES ON. Head of bolt=greasy. Shank of bolt=dry. 
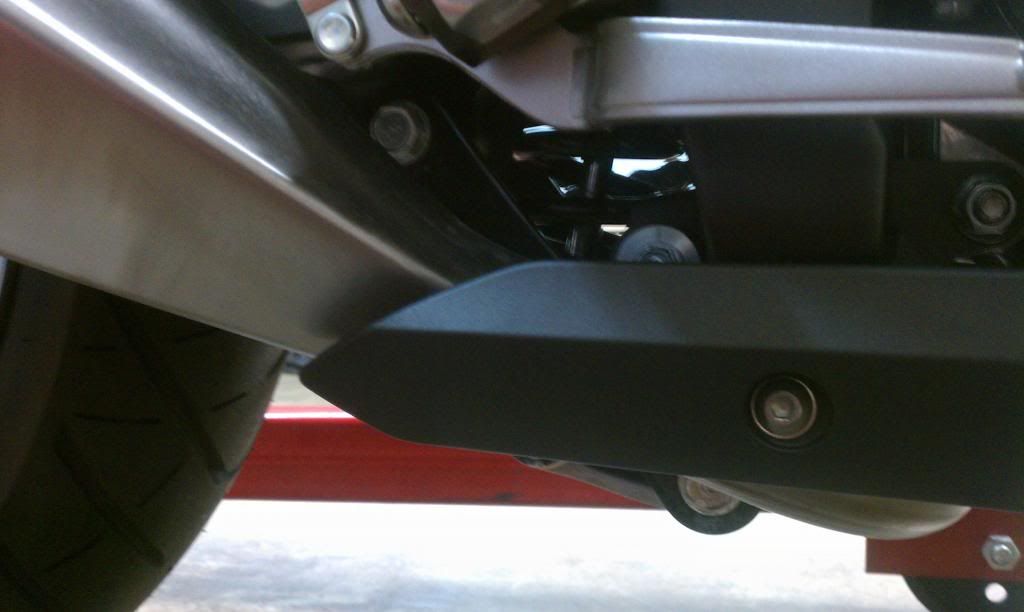
I had to remove the exhaust heatshield to get the 19mm bolts out. There was a band clamp at the bottom of the shield around the pipe that I loosened and slid down the pipe to get it out of the way and a 5mm hex bolt visible from the outside. There is also a tab at the top of the shield that attached to the silencer, I had to slide the shield forward to free it from the bike.
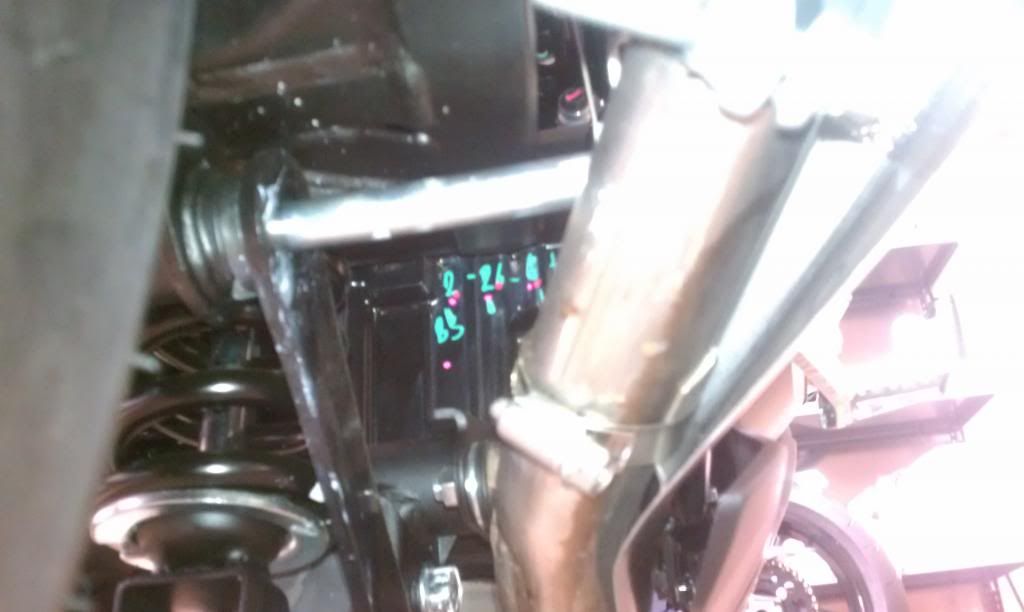
With the heat shield out of the way and the nuts off of the 19mm bolts I raised the hoist until there was no pressure on the suspension and the bolts slid right out. The new links go in with the single hole on top, and your choice of holes on the bottom. The shortest choice out of the 5 (top left hole in the pic below) is the same as the stock link. I chose the nearest one to stock, which lowered the bike 1" +/- 1/8" according to my tape measure. I have seen other internet posts about the top center hole being the one for 1". Update - I switched to the top center hole which is correct for the 1" drop, bike sits level this way. Pictures will still show the wrong hole being used. - This is my only disappointment with the Roaring Toyz products so far - $200 worth of beautiful billet aluminum parts but not a single scrap of paper with any instructions, descriptions, or warnings. Nothing. A note about which hole drops the bike how far would have been helpful.

So with the lowering links bolted in place and the heat shield back on I set the bike down on the ground and checked out the kickstand situation. With the bike now 1" lower than stock the factory kickstand worked, but the bike was too upright for my comfort. Replacing it was simple.
With the kickstand up (bike on stands) I removed the springs from the kickstand.
I then removed the 5mm hex bolt attaching the lower fairing to give myself some room to work. I did not need to remove the entire fairing, I just needed to be able to pry it down a little bit. With the fairing loose, I removed the screw holding the actuator for the kickstand kill switch. Be careful, there is a lock washer and a nylon washer behind the screw. The kickstand itself is held with a 17mm bolt and nut. The new kickstand uses the same bolt, but in a different way. The factory stand has the bolt on the inside and the nut on the outside of the stand. The new one has the bolt on the outside and the inside of the stand is threaded itself (no nut needed). With the new stand on I put the kill switch actuator back on - being careful to align the index ( 2 flat sides) on the switch with the actuator. I reattached the springs and DONE!

All together I did this project in under 2 hours by myself and taking time for pictures and wiping white grease off of everything I touched.
update - took it for a short test ride - I didn't notice any adverse affects in handling or steering. The only difference is that the riding position is very upright now with the bars higher and closer.


